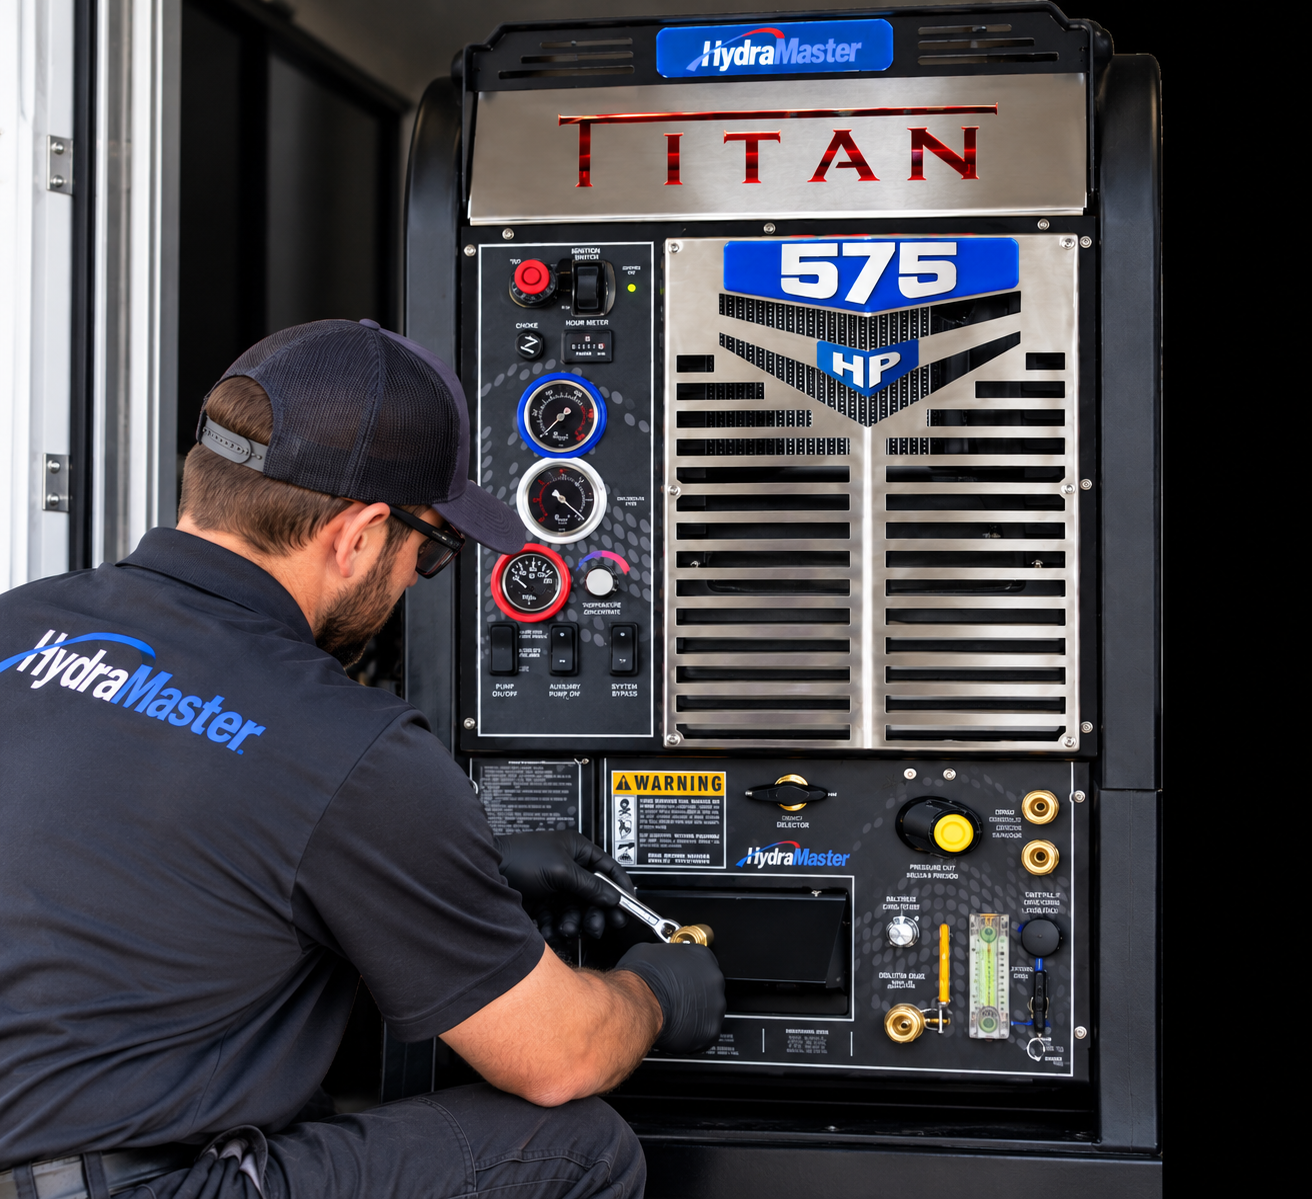
Truckmount Maintenance Is Part of Your Plan to Prosper and Grow
A practical maintenance guide for truck-mounted carpet and hard-surface cleaning equipment
Routine preventive maintenance helps keep a truckmount productive, protects your investment, supports consistent cleaning results, and reduces avoidable downtime. A truckmount is a working system made up of several components—such as an engine or vehicle powertrain, vacuum blower, solution pump, heating system, recovery tank, plumbing, and electrical controls—and each has its own service needs.
Truckmount designs vary by manufacturer and model. Direct-drive or vehicle-powered systems, slide-in units, and other mobile systems may require different procedures. Heating systems also vary: many use heat exchangers, while some use propane or diesel-fired burners. Use the schedule below as a general checklist, not as a substitute for the owner’s manual.
Important: The maintenance intervals, lubricants, fluids, pressure settings, and winterizing procedures in your specific machine and component manuals take priority. If a recommendation here differs from the manual, follow the manual or contact an authorized service professional.
Before the First Job: Installation and Familiarization
- Have the system installed correctly. Use a qualified installer familiar with the machine, vehicle, mounting, ventilation, exhaust routing, fuel supply, electrical connections, and applicable regulations.
- Learn the machine before putting it to work. Ask the installer or distributor to demonstrate startup, normal operating ranges, shutdown, emergency stops, filter cleaning, chemical controls, and freeze protection.
- Keep the manuals and service records. Save the truckmount, engine, blower, pump, burner/heater, and vehicle manuals. Record the model, serial number, installation date, operating hours, and service history.
- Complete warranty registration. Register the machine with its manufacturer and retain proof of purchase and installation, if required.
After Every Job / Daily
- Check fluid levels before operation. Check engine oil, blower oil, solution-pump oil, coolant, and other specified fluids as applicable. Check only as instructed by the component manufacturer and correct any unexplained loss.
- Inspect for leaks and abnormal conditions. Look for fuel, oil, coolant, and water leaks; damaged wiring; loose fittings; unusual noise, vibration, smell, smoke, or overheating. Stop and investigate abnormal conditions rather than continuing to operate.
- Clean the recovery tank and filters. Empty the tank safely and clean the lint basket, filters, drain, and accessible surfaces. Check the float shutoff or other recovery protection. Do not allow foam or liquid to enter the vacuum blower.
- Check water supply and inlet screens. Clean the incoming-water screen and other user-serviceable filters. Never run a pump without the water supply or lubrication required by its manufacturer.
- Flush the solution and chemical systems. Flush cleaning solution and chemical residue with clean water using the machine’s shutdown procedure. Follow specific guidance for chemical metering systems and pumps.
- Inspect hoses, tools, and connections. Look for cuts, bulges, leaks, damaged cuffs, worn quick-connects, loose fittings, clogged jets, and damaged wand vacuum slots. Remove damaged high-pressure hoses and fittings from service.
- Lubricate the vacuum blower only as specified. Some blowers require end-of-day mist lubrication through a designated port; others have different requirements. Use only the lubricant and procedure specified for the exact blower and truckmount. Never assume a generic spray lubricant is acceptable, and never put hands or tools near moving parts.
- Clean and visually inspect the machine. Remove debris and wipe down accessible surfaces so leaks, loose hardware, and developing problems are easier to spot. Keep cooling-air inlets and heat-exchanger surfaces clear.
Weekly (or More Often in Heavy Use)
- Inspect belts, pulleys, couplings, and mounts. Look for cracking, glazing, fraying, misalignment, abnormal wear, or looseness. Adjust tension and alignment only to the manufacturer’s specifications.
- Inspect electrical and battery connections. With the system safely shut down, look for corrosion, chafed insulation, loose connections, damaged terminals, or signs of overheating. Have electrical repairs performed by a qualified technician.
- Check chemical metering and solution delivery. Clean strainers and chemical containers as directed; inspect feed lines for cracks, air leaks, blockage, or chemical buildup.
- Check safety and protective devices. Inspect accessible vacuum relief devices, recovery-tank float shutoffs, temperature controls, and other protective devices according to the manual. Never bypass a safety device to keep working.
- Inspect plumbing, exhaust, and cooling airflow. Check accessible water lines, clamps, heat-exchanger surfaces, exhaust connections, guards, and ventilation openings for damage or blockage. Allow hot components to cool before inspection.
- Check mounting hardware and fluid lines. Look for loose fasteners, rubbing hoses, chafing, and contact between components. Tighten only to specified torque values; do not overtighten.
At the Manufacturer’s Hour-Based Service Intervals
Do not rely on a universal monthly or hourly oil-change interval. Engines, vacuum blowers, solution pumps, and burners have different service schedules, and severe duty, high ambient temperatures, dust, or extended operating hours may change the required interval. Use each component’s manual and track operating hours.
- Change engine oil and filters. Use the engine manufacturer’s specified oil grade, filter, break-in interval, and service interval.
- Service blower and solution-pump lubrication. Check levels and change oils or lubricants at the intervals and with the products specified for the exact blower and pump. Some components have separate break-in service requirements.
- Service engine intake and fuel systems. Inspect or replace air filters, fuel filters, spark plugs, and other items as specified. Dusty environments and hot-weather operation may require more frequent inspection.
- Inspect direct-drive or vehicle-powered components. Follow the manufacturer’s lubrication chart for drive shafts, U-joints, couplings, clutches, and other driveline components. Use the specified grease and interval; do not assume all direct-drive systems use the same schedule.
- Inspect and service the heating system. Descale water-side passages or heat exchangers only when required by the manufacturer and local water conditions. For burner-heated machines, have fuel delivery, ignition, combustion, and exhaust components inspected as specified.
- Check operating performance. Verify pressure, temperature, vacuum, flow, and engine speed against the machine’s published specifications using the proper instruments and procedure. Do not adjust relief valves, governors, or safety controls by guesswork.
- Inspect sacrificial anodes, if fitted. Check and replace them according to the heating-system manufacturer’s instructions.
Seasonal and Annual Service
- Arrange a comprehensive inspection. Have a qualified truckmount technician inspect the engine, blower, pump, heating system, hoses, plumbing, wiring, mounts, gauges, controls, and safety devices. Address small leaks and performance changes before they cause downtime.
- Service coolant according to the engine manual. Do not automatically replace coolant every year. Use the specified coolant chemistry, concentration, compatibility, and replacement interval; never mix incompatible coolant types.
- Review the vehicle as well as the truckmount. Maintain the van or truck, including its cooling system, charging system, fuel system, tires, brakes, and ventilation. The vehicle is part of the operating system.
- Review maintenance records. Check that service intervals have not been missed and investigate repeated fluid loss, overheating, pressure fluctuation, low vacuum, unusual noise, or recurring electrical faults.
Cold-Weather Protection and Winterizing
Freezing temperatures can damage pumps, heat exchangers, valves, filters, hoses, and other water-bearing components. Prepare before cold weather arrives, and follow the exact freeze-protection procedure for the machine and all connected accessories.
- Know the required procedure and product. Different systems may require different antifreeze chemistry, concentration, and quantity. Use only a product approved for the equipment and follow the manufacturer’s directions—do not assume every truckmount uses 100% antifreeze or a 50/50 mixture.
- Drain and protect every water-bearing component. Follow the specified sequence for the water box, solution pump, heat exchanger, chemical system, hoses, wand, filters, and any auxiliary tanks. Confirm that antifreeze reaches all components that require protection.
- Protect the vehicle and equipment between jobs. Whenever possible, store the vehicle in a heated area. If that is not possible, use only a safe, suitable heating strategy and monitor temperatures. Do not use open flames or unapproved heaters in the vehicle.
- Carry supplies and plan for temperature drops. Keep the approved freeze-protection supplies available during cold weather. Store hoses, tools, and chemicals as their manufacturers direct.
- Dispose of recovered antifreeze responsibly. Follow product labeling and local regulations. Do not discharge antifreeze or recovered solution to storm drains, waterways, or the ground.
Additional Best Practices
- Use compatible cleaning chemicals. Follow dilution instructions and avoid mixing incompatible products. Flush chemical lines as directed and clean containers regularly.
- Prevent foam from reaching the blower. Use appropriate defoamer when needed, monitor recovery-tank conditions, and keep filters and float shutoffs in good condition. Foam can pass some shutoff systems and damage the vacuum blower.
- Do not operate with unresolved warning signs. Stop the machine if it overheats, loses pressure or vacuum unexpectedly, emits smoke, develops a fuel or exhaust leak, or makes unusual mechanical noises. Shut down safely and have the cause diagnosed.
- Keep a maintenance log. Record date, engine hours, work performed, fluids and parts used, measured readings, repairs, and the technician. A simple log helps identify trends and supports warranty or service discussions.
- Keep the work area safe. Park securely, use the parking brake, provide adequate ventilation, and keep people away from hot exhausts, moving belts, fans, and pressurized lines. Shut down and allow components to cool before servicing.
- Use qualified service for technical adjustments. Fuel systems, burners, high-pressure plumbing, electrical faults, relief valves, and internal blower or engine work should be handled by trained personnel with the correct service information.
A Simple Maintenance Log
| Date | Machine / Serial No. | Hour Meter | Service Performed / Readings | Next Service Due |
Resources
Start with the owner’s manual for your specific truckmount and the separate manuals for its engine, blower, pump, heater/burner, and other major components. If the manual is missing, contact the machine manufacturer or an authorized service provider and request the correct version for your model and serial number.
- HydraMaster manuals (for HydraMaster equipment): https://hydramaster.com/manuals/
- For other truckmount brands, visit the manufacturer websites and do a search for “manuals.”
Bottom line: Consistent, documented preventive maintenance helps reduce downtime, extend component life, and deliver dependable cleaning results. Because truckmounts differ, the safest and most cost-effective maintenance plan is one built around the specific machine and component manuals.
Leave a Reply